

Document Setup
Open Inkpad and create a new drawing using the following settings:
Snap to points: On
Snap to Grid: On
Grid: On
Grid Spacing: .5 in
Size and Units: 8 in x 8 in

Basic Shape
Using the circle Tool, create a circle similar to the one illustrated below.


Stacking Shapes
Let's establish the basic pumpkin colors. First, fill the pumpkin outline with a radial gradient. Take note of the positioning of the gradient indicator.
Create 4 gradient stops and position them to the right in a similar fashion to the depiction. Exact positioning isn't important at this point as we will be tweaking later.
The colors I used (from left to right) are as follows:
Color 1
R:135 G:65 B:0
Color 2
R:255 G:153 B:0
Color 3
R:255 G:199 B:0
Color 4
R:255 G:236 B:108

Select the Scale tool. Begin to scale the copied pumpkin shape. Similar to breaking the handles on an anchor point, place a second finger down during the scaling process. This activates the non-uniform scale mode and will allow you to squash the pumpkin similar to the pic below. This is a little tricky and may take a few tries and practice to get the hand of it. If you are having difficulty scaling the shape the way you want, try turning off the snap settings.

Repeat the previous copy, paste, and scale actions to create another layer of pumpkin.

Repeat again... And your pumpkin should now look like this.

Next, remove the darkest color from the gradient of the front pumpkin shape.
Select each of the shapes and adjust the position of the darkest gradient stop so that it blends in with the shape in front of it.

Select the top anchor point of the frontmost shape. With the Selection Tool selected, double-tap on the anchor point. This will convert it to a corner. Now, double-tap it again. This will return it to a smooth curve.

Adding Detail
Create a new layer below the pumpkin shapes for the stem. With the Brush Tool selected, draw a stem shape.

Use a radial gradient to set the colors of the stem.
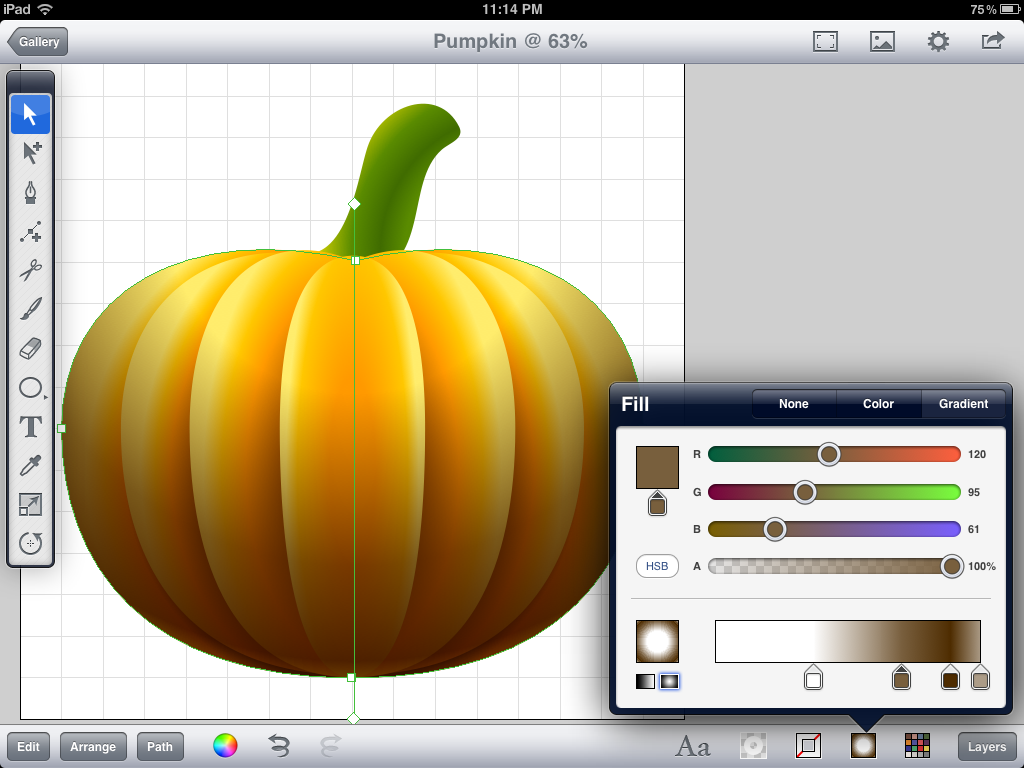
To add further realism to the pumpkin we will add a shadow.
Copy the largest pumpkin shape and paste it into a new layer above all other layers.
Fill the layer with a radial gradient and set the transfer mode to multiply.

Set the gradient controls to have the smaller radius on top. Extend the control slightly beyond the top and bottom if the shape.
The colors used for the gradient stops are (left to right):
Color 1
R:255 G:255 B:255
Color 2
R:181 G:95 B:61
Color 3
R:78 G:44 B:0
Color 4
R:172 G:156 B:135
Notice Color 2 gives the pumpkin a much richer orange hue.
Shadows
Create a new layer above the layered pumpkin artwork.
Select the back most pumpkin shape. Copy it and paste it in your new layer.
Fill it with a centered radial gradient using colors similar to the gradient pictured below. Keep the darker colour a warm color.
Change the Blend Mode to Multiply (under Shadow and Opacity menu)

Adjust the gradient controls by bringing the center gradient control point just past the top of the pumpkin - and the outer control point just past the bottom. See example below.

Use a non-uniform scale (two finger technique) to squash the shadow.

Place the shadow below the pumpkin and send the layer below all other layers. Adjust the location of the gradient stops until you are satisfied with the look if the shadow.
Add some details to the stem. A couple of subtle, well placed highlights help a lot.
One final step. Create a background layer below all other layers. Create a box and fill it with a linear gradient.

No comments:
Post a Comment