


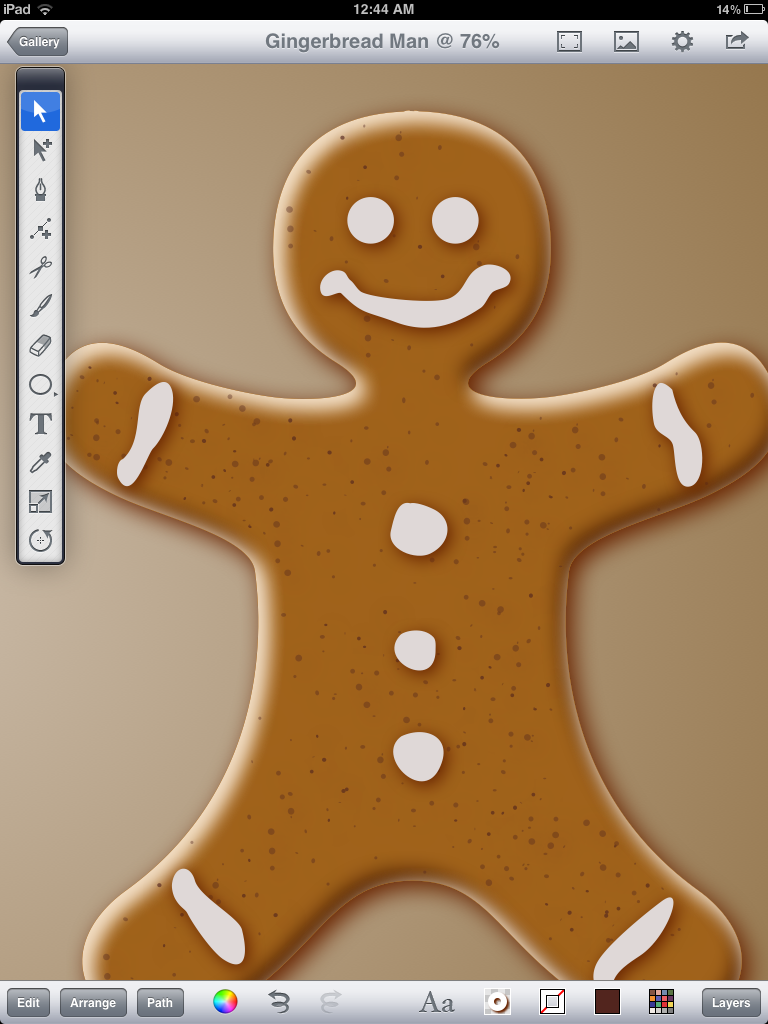
This technique was used to create the gingerbread man pictured at the top of this post.
Follow the tutorial steps below to get started.
Preparing Drawing
Open Inkpad on your iPad.
Create a new illustration. I used 8.5X11 portrait for this illustration.
Set the grid switch to "ON" under the Settings icon.
Set Snap to Grid switch to "ON".
Set your grid spacing to .25.

Creating Gingerbread Man Outline
Create a new layer called "Centerline" and draw a line down the center of the page.
This will be used as the mirror plane. The artwork you draw on one side of this line will be reflected, or mirrored across to the other side to create the whole illustration.
Lock the "Centerline" layer (press the lock icon in the Layers menu).
Create another new layer and name it "Outline".
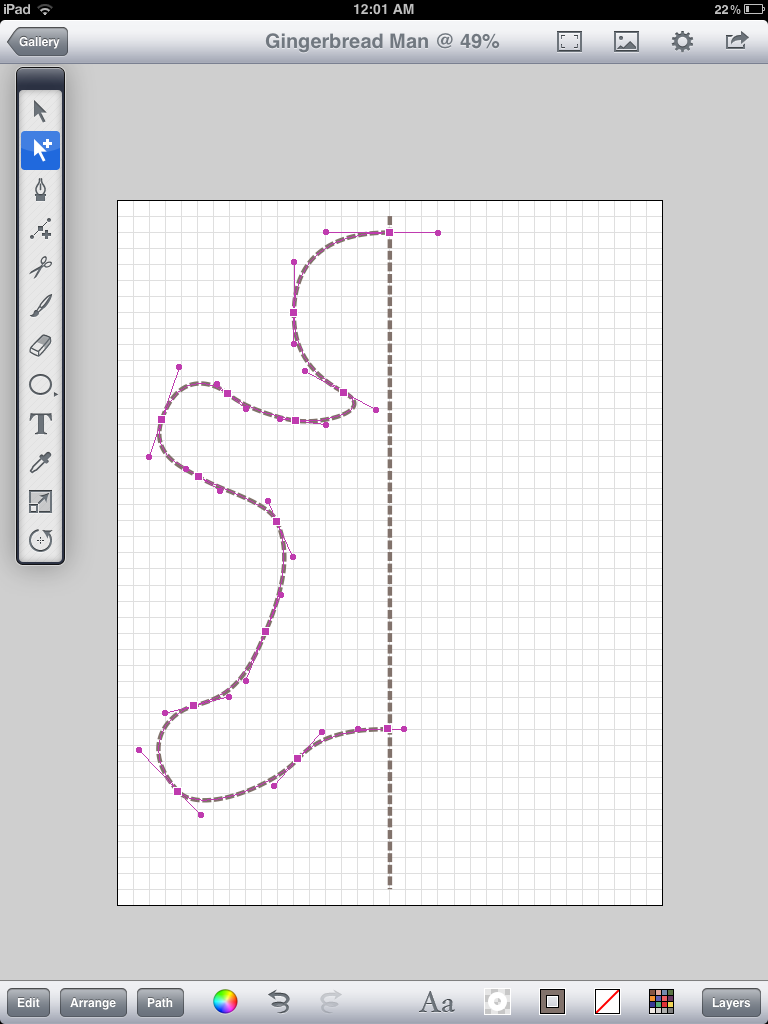
Using the bezier tool (third tool down) draw an outline similar to the image below. You may want to turn off snap to grid to do some last minute tweaks. Make sure the points on the right touch the centerline.
Duplicate the gingerbread man outline using the Edit>Duplicate in Place command.
Flip the duplicate copy of the outline using Arrange>Flip Horizontally.
Your drawing should look something like this.

Move the flipped outline to the right (hint: once you start the move, place a second finger on the screen to constrain the movement to be horizontal only).

Select both halves of the gingerbread man outlines and unite them using Path>Unite.
Note: if the centerline points were not centred over one another you may have a little cleanup to do at this point... select each stray point with the selection tool and use the Path>Delete Anchor Points command to remove them.
Hide the Centreline layer and you should now have a completely symmetrical outline of the gingerbread man.

Fill the outline with a reddish brown color:
R=180
G=98
B=27

Highlights and Shadows
The illusion of depth is created by highlights and shadows on the edge of the gingerbread man. This technique is similar to the one covered in my Curious Jelly and Neon Sign postings.
Hide the underlying outline layer.
Name the new layer "Shadow". Draw a rectangle that covers the entire outline (see example below). Send the rectangle behind the outline by using the Arrange>Send to Back command.

With the multiple selection tool (second one down) select both the gingerbread man outline and the box.
Subtract the outline from the box by using the Path>Subtract Front command.

In the Shadow and Opacity tool menu turn the Shadow switch to "ON".
Set the drop shadow angle using the wheel to set the angle.
Set the shadow offset to 4 pt and the shadow blur to 12pt
The shadow color should be a slightly darker version of the reddish brown as the shadow.
R=74
G=27
B=0

Duplicate the "Shadow" Layer and name it "Highlight".
Select the Highlight layer and change the color of the shadow to:
R=243
G=222
B=195
Rotate the shadow direction wheel to the opposite end of the wheel.

Masking
Hide the Shadow and Highlight layers in the Layer panel.
Unhide the original outline, select and copy it, and hide it again.
Unhide the Shadow layer.
Step 1 - Paste the outline into the Shadow layer.
Step 2 - Set the outline fill and stroke to none.
Step 3 - Select all the contents of the Shadow layer by using Edit>Select All in Layer
Step 4 - Mask the contents by using the Path>Mask command.
Repeat Steps 1 to 4 with the highlight layer.
After adding a shadow to the outline layer, your drawing should look similar to this:

Create a new layer to add icing details.
Sketch them in using the brush tool. Turn shadows on.
Texturing
Create another new layer below the icing details for the gingerbread man texture. Begin creating a series of small circles similar to example below. Once you have done a small section use the Edit>Duplicate command to duplicate them. Then, position them in a vacant area on the gingerbread man.

Continue doing this until you fill all areas.
When texturing is complete, select them all by using the Edit>Select All in Layer command and apply a shadow to the dots. By using a light colour it will give the illusion of being embossed into the gingerbread. Use the following color settings:
R=227
G=212
B=194
Offset = 2
Blur=3
Ensure the Shadow angle is set to a similar angle as the wheel below.

Final steps:
Duplicate the texture layer. Lock all other layers.
Select all and change the color to a lighter color (as below)
Change shadow color to dark color.
I added some highlights on the icing using the brush tool.
These were filled with a gradient fill going from white to transparent.
I was having doubts about this app, but your tutorials and designs have given me new found hope. Thank you for such great tutorials and the inspiration!
ReplyDeleteWonderful! Thanks for the feedback.
ReplyDelete